The goal of this lab is to build a command-line Todo List application using Java Database Connectivity (JDBC) with PostgreSQL.
In modern applications, persistent data storage is crucial. While file-based storage (as seen in previous labs) works for simple cases, databases offer persistent, robust, efficient, and scalable solutions for data management.
Technologies Used Docker & Docker Compose Docker is a platform that allows us to package applications and their dependencies into containers. Containers are operating-system-level virtualization technology. They are lightweight, standalone processes that can run consistently across different environments. We’ll use Docker Compose to easily set up our PostgreSQL database and pgAdmin without installing them directly on your system.
PostgreSQL PostgreSQL is an open-source relational database system known for its reliability, enterprise-grade features, and performance. Many major companies like Microsoft, Google, Reddit, and Instagram use PostgreSQL in their core products.
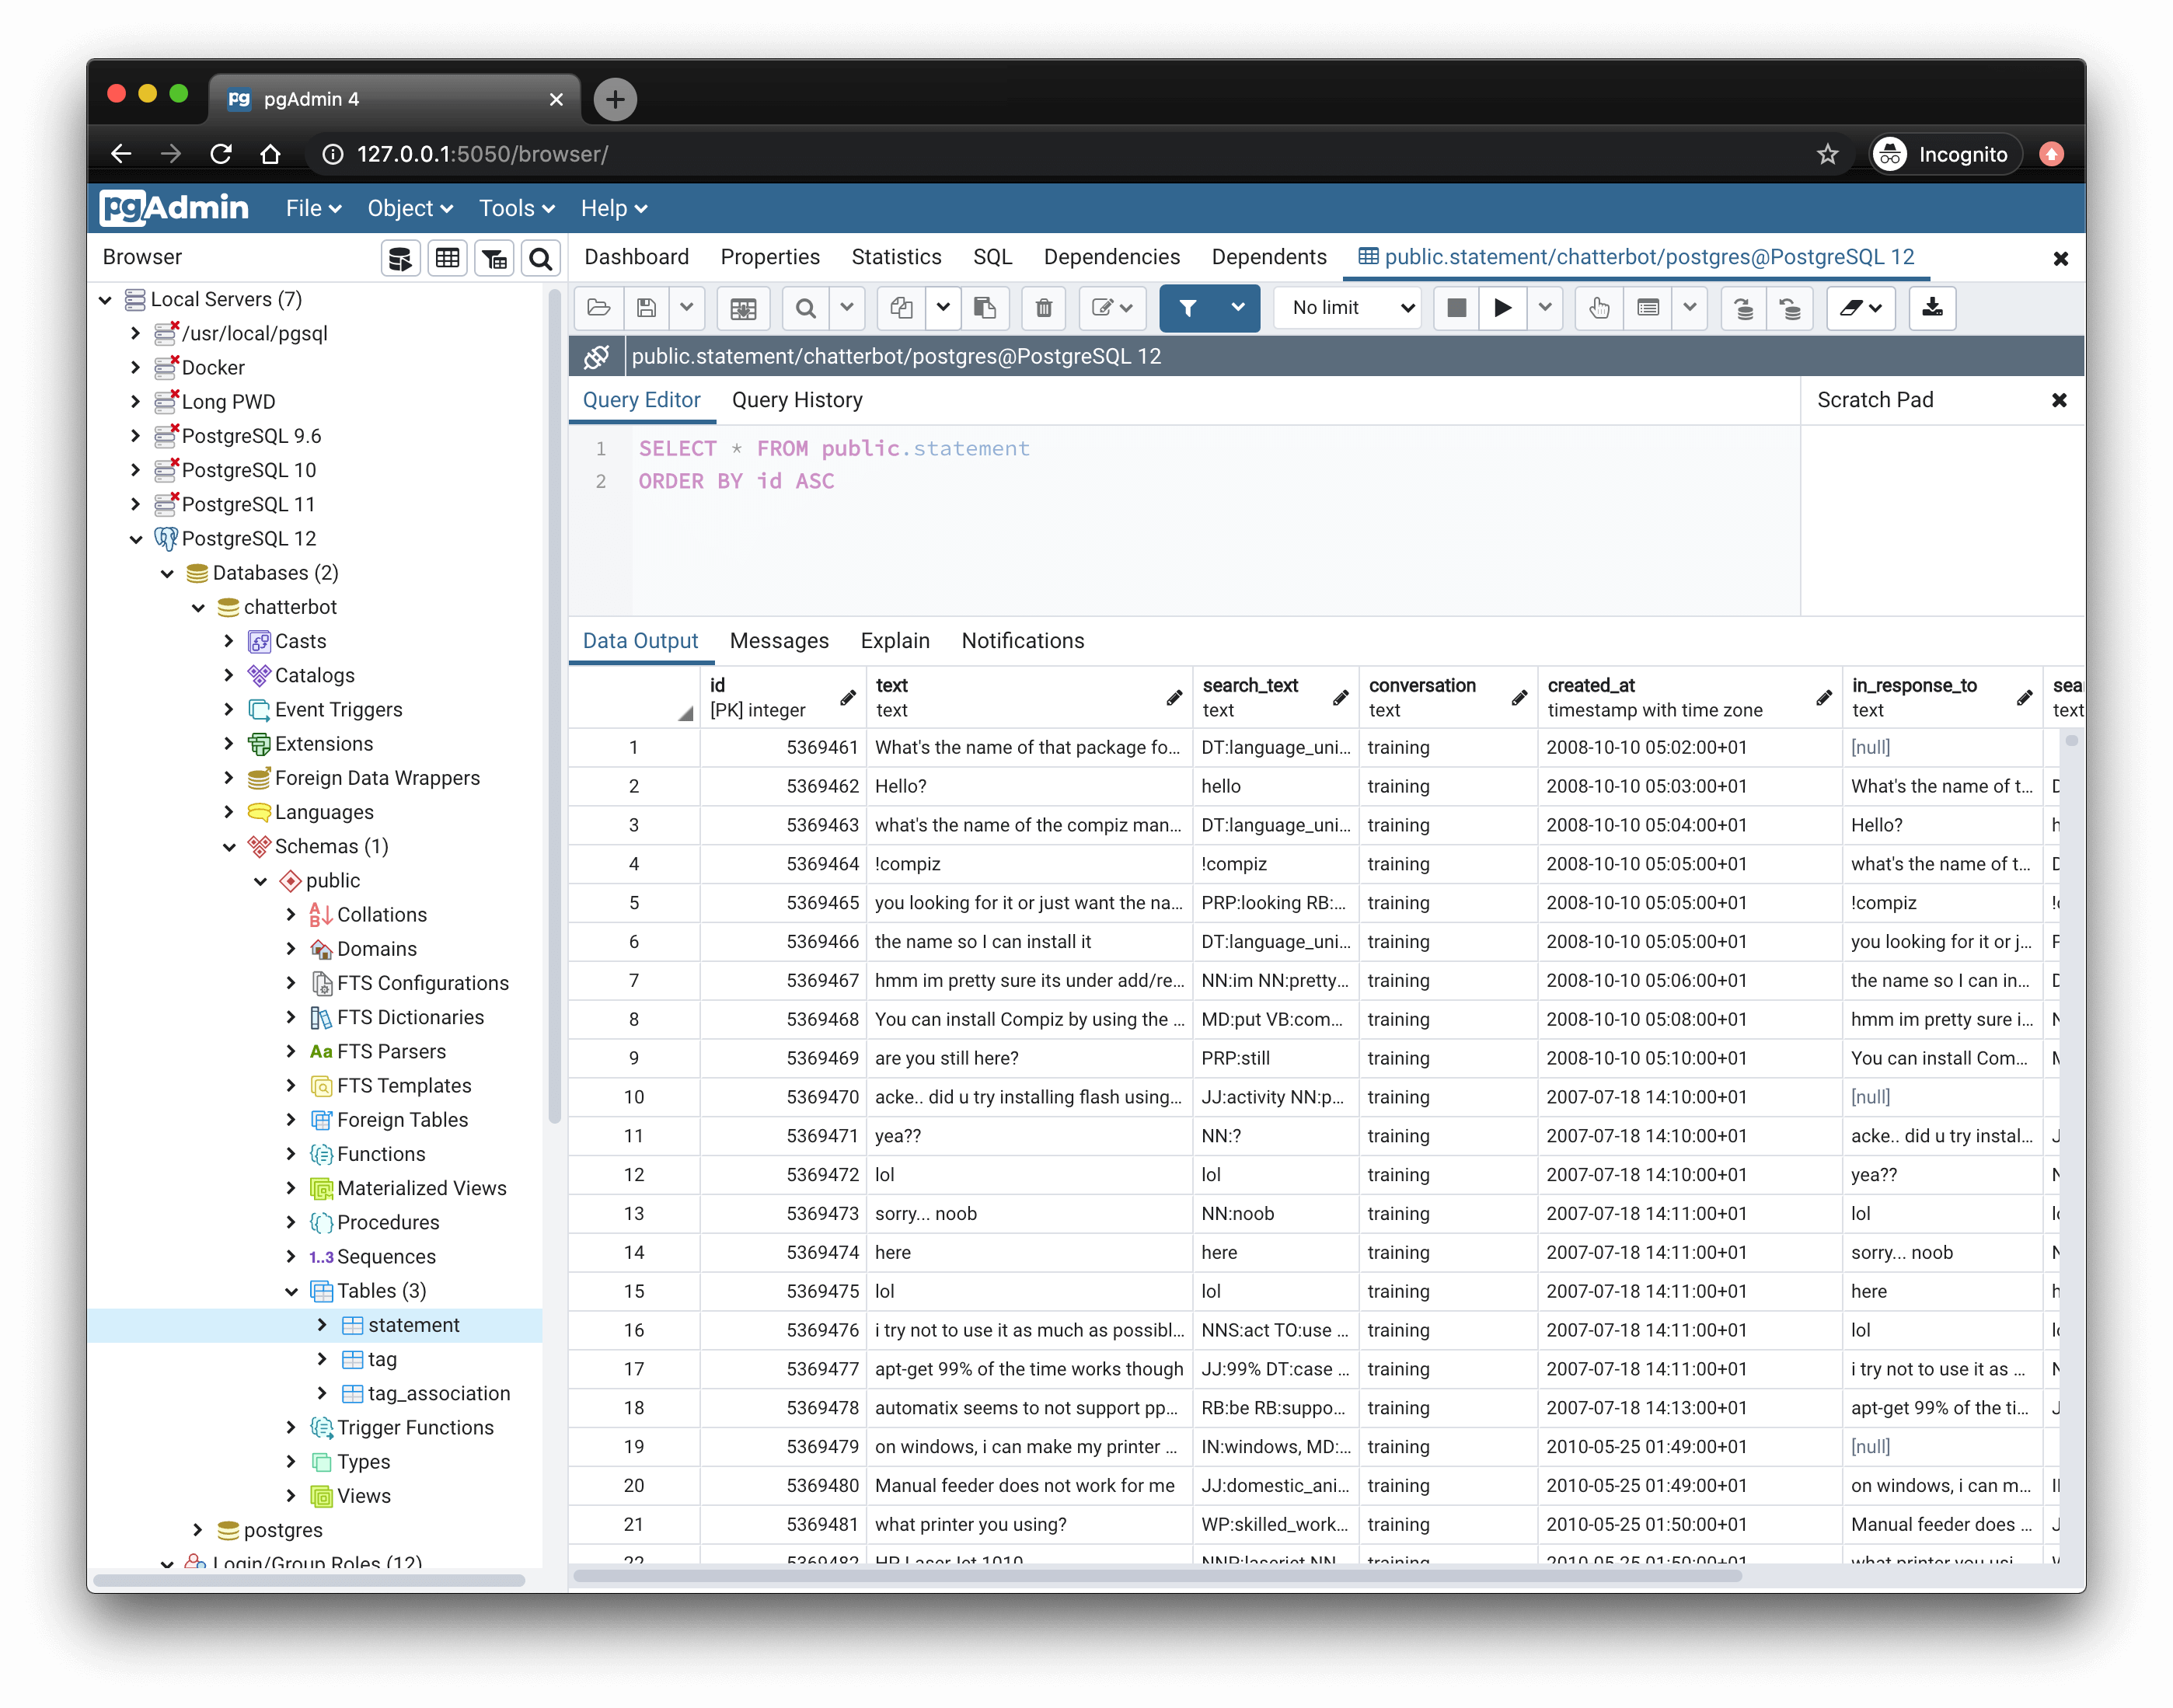
pgAdmin pgAdmin is a web-based GUI tool for managing PostgreSQL databases. It makes it easier to create databases, tables, and execute SQL queries through a user-friendly interface.
Objectives In this lab you will:
Set up a development environment with:
PostgreSQL database server running in Docker pgAdmin web interface for database management Java project with JDBC connectivity Implement a Todo List application that can:
Add new tasks List all tasks Mark tasks as complete Delete tasks Learn and implement:
JDBC database connections SQL queries and prepared statements Basic CRUD operations Resource management and connection pooling Getting Started If your instructor is using GitHub classroom, you will need to accept the assignment using the link at the bottom of this page , clone your auto-generated repository, and import it as a project into your IDE.
If your instructor is not using GitHub classroom, clone and import the template project at https://github.com/cpit305-spring-25-IT1/lab-08 ↗.
Task 1: Setting Up the Development Environment Create a docker-compose.yml file in your project root: 1
2
3
4
5
6
7
8
9
10
11
12
13
14
15
16
17
18
19
20
21
22
23
24
25
26
27
28
29
30
31
32
33
34
35
36
37
38
39
40
41
services :
postgres :
image : postgres:16.4-alpine
container_name : postgres_container
env_file :
- .env
ports :
- "$POSTGRES_PORT:5432"
restart : unless-stopped
volumes :
- pg_data:/var/lib/postgresql/data
networks :
- app_network
healthcheck :
test : ["CMD-SHELL" , "pg_isready" , "-U" , "${POSTGRES_USER}" , "-d" , "${POSTGRES_DB}" ]
interval : 10s
timeout : 5s
retries : 3
pgadmin :
image : dpage/pgadmin4:8.11.0
container_name : pgadmin_container
env_file :
- .env
volumes :
- pgadmin_data:/var/lib/pgadmin
depends_on :
- postgres
ports :
- $PGADMIN_PORT:80
networks :
- app_network
networks :
app_network :
driver : bridge
volumes :
pg_data :
pgadmin_data :
Create a .env file to store our database credentials and secrets. .env file:
1
2
3
4
5
6
7
8
POSTGRES_HOST=postgres
POSTGRES_USER=postgres
POSTGRES_PASSWORD=changeme
POSTGRES_DB=tododb
POSTGRES_PORT=5432
PGADMIN_PORT=5050
PGADMIN_DEFAULT_EMAIL=example@example.com
PGADMIN_DEFAULT_PASSWORD=changeme
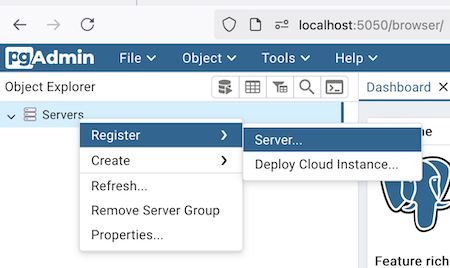
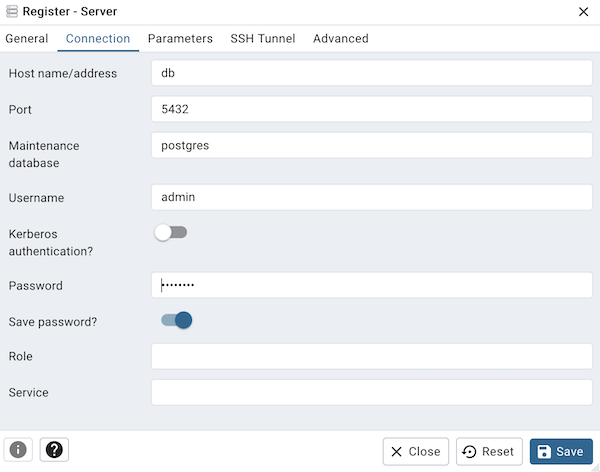
Start the containers: Open the web browser to access pgAdmin at http://localhost:5050 . Login using the email and password defined in the .env file: Email: example@example.com and password: changeme . Register a new server (Right click on Servers -> Register -> Server): Name: TodoServer Click on the connection tab and enter the connection details defined in the .env file:Host: postgresPort: 5432Username: postgresPassword: changeme Click Save
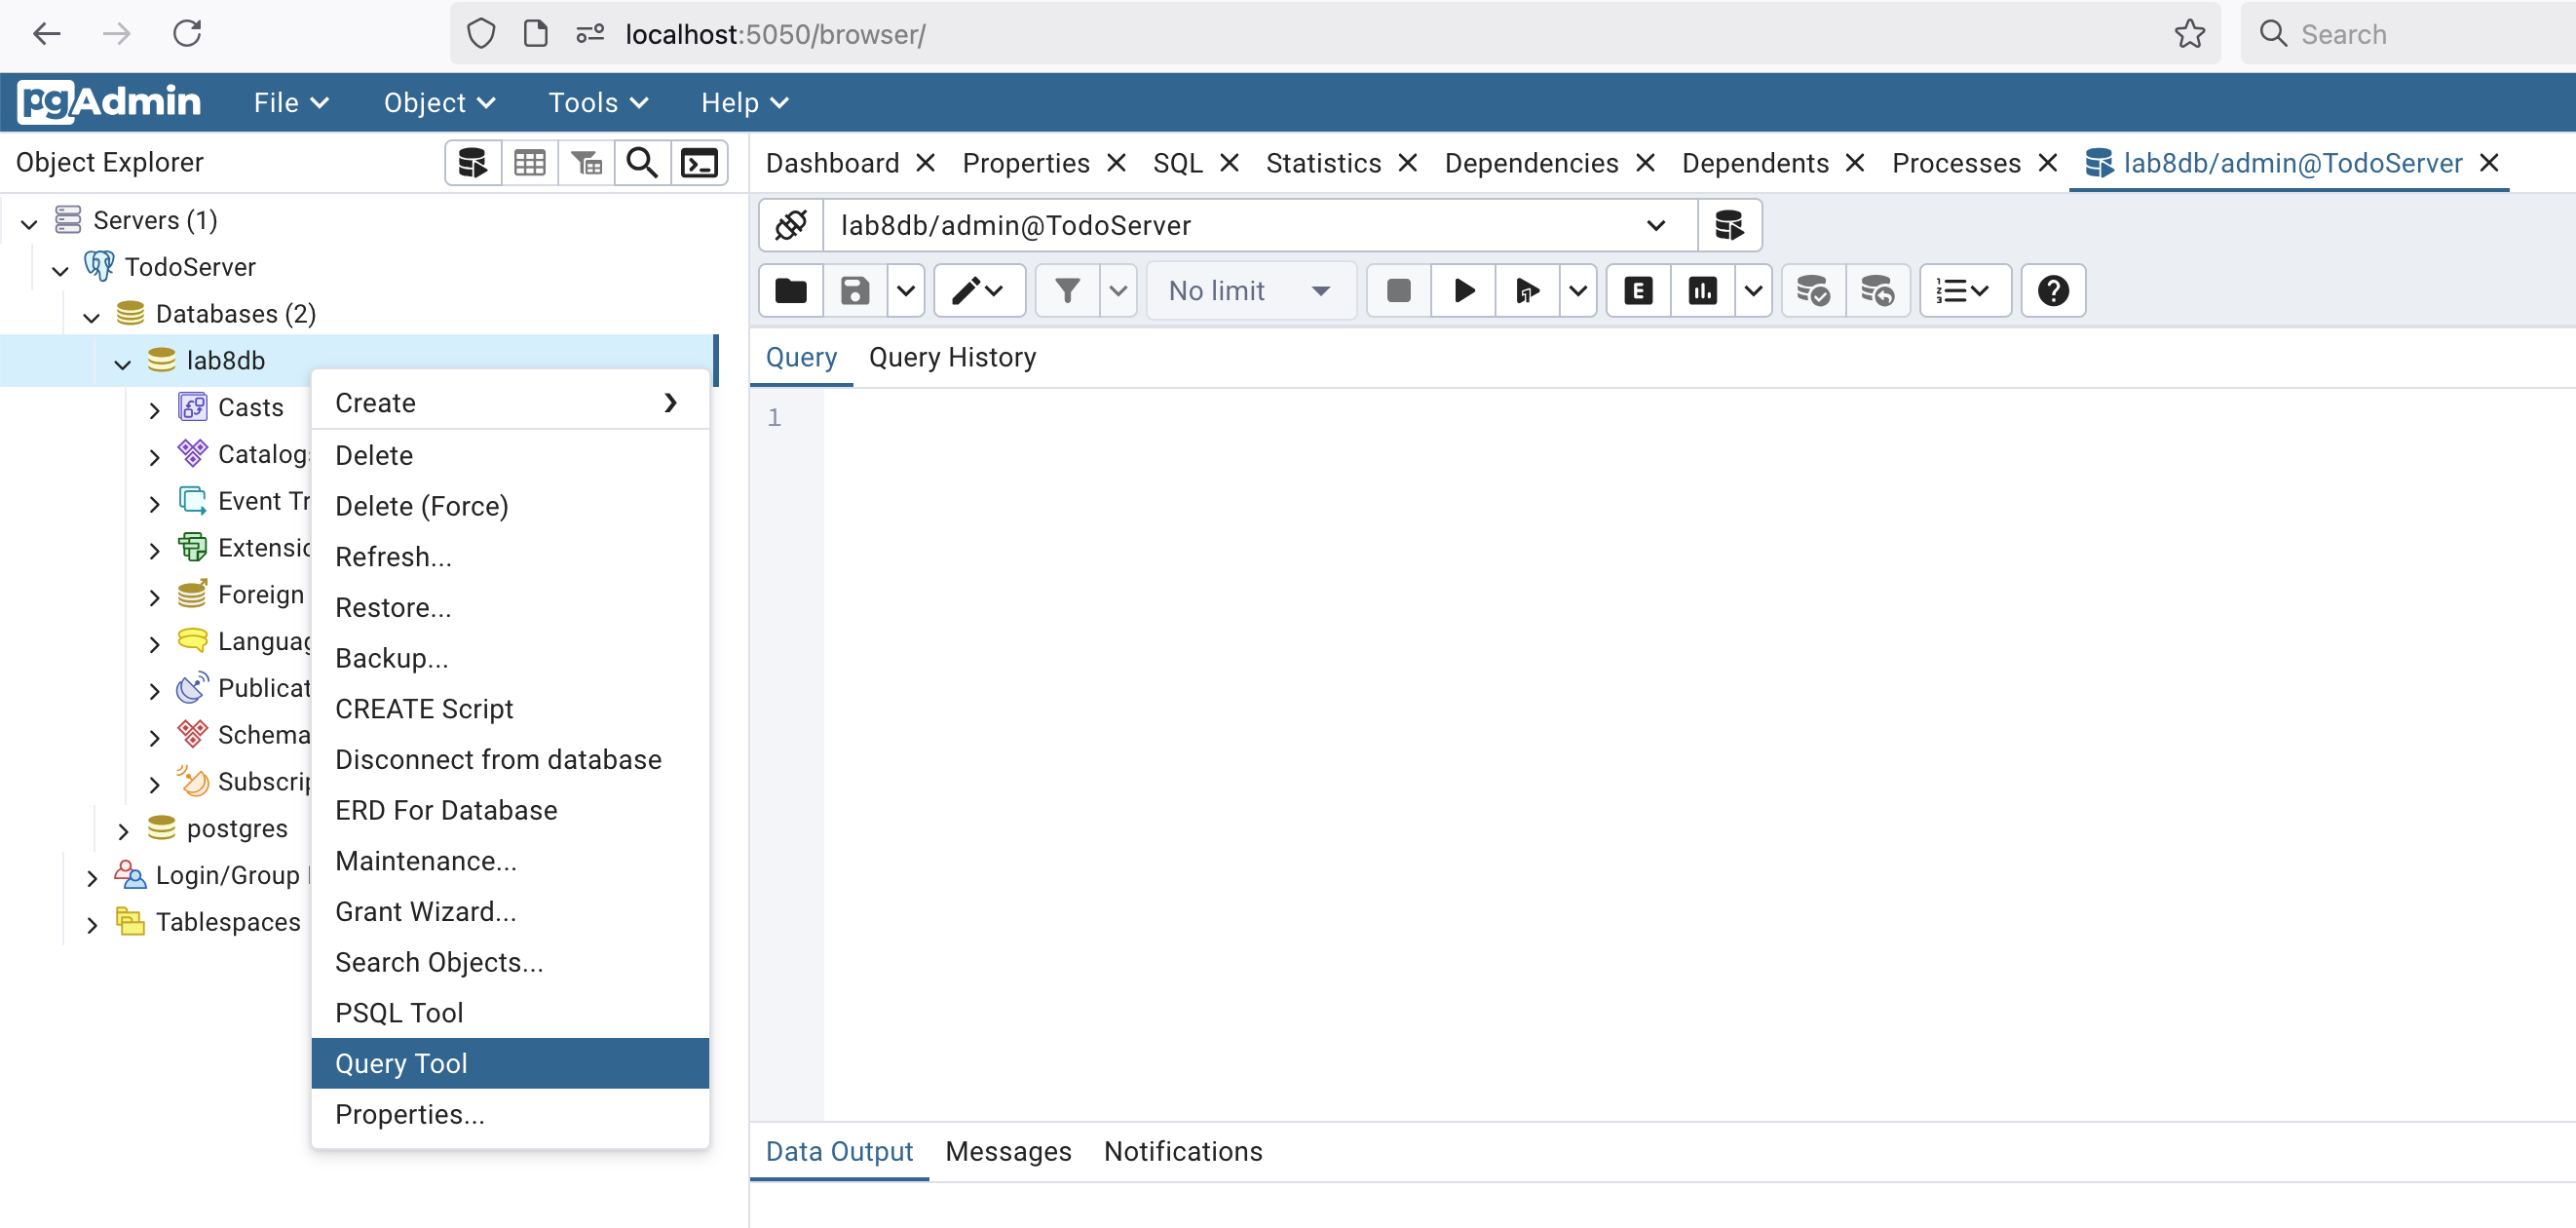
Create the tasks table: Select the database from the Object Explorer: TodoServer -> Databases -> tododb Right click on the database (tododb) and select Query Tool
Copy and paste the following SQL code to create the database table. 1
2
3
4
5
6
CREATE TABLE tasks (
id SERIAL PRIMARY KEY ,
title VARCHAR (255 ) NOT NULL ,
completed BOOLEAN DEFAULT FALSE ,
created_at TIMESTAMP DEFAULT CURRENT_TIMESTAMP
);
Refresh the Tables item at tododb -> Schemas -> public -> Tables (right click and select refresh) Right click on the table (tasks) and select View/Edit Data -> All Rows Task 2: Implement the Database Connection Create a DatabaseConnection class that manages database connectivity:
1
2
3
4
5
6
7
8
9
10
11
12
13
14
15
16
17
18
19
20
21
22
23
24
25
26
27
28
29
30
31
32
33
34
35
36
import java.sql.Connection;
import java.sql.DriverManager;
import java.sql.SQLException;
public class DatabaseConnection {
// Values from .env hardcoded (You should read the .env file in a real application)
private static final String HOST = "localhost" ;
private static final String PORT = "5432" ;
private static final String DB = "tododb" ;
private static final String USER = "postgres" ;
private static final String PASSWORD = "changeme" ;
private static DatabaseConnection instance;
private Connection connection;
private DatabaseConnection () throws SQLException {
try {
String url = String.format ("jdbc:postgresql://%s:%s/%s" , HOST, PORT, DB);
this .connection = DriverManager.getConnection (url, USER, PASSWORD);
System.out .println ("Connected to database: " + url);
} catch (Exception ex) {
System.out .println ("Database Connection Creation Failed: " + ex.getMessage ());
throw new SQLException(ex);
}
}
public Connection getConnection () {
return connection;
}
public static DatabaseConnection getInstance () throws SQLException {
if (instance == null || instance.getConnection ().isClosed ()) {
instance = new DatabaseConnection();
}
return instance;
}
}
Task 3: Implement the Task Model Create a Task class to represent todo items:
 1
 2
 3
 4
 5
 6
 7
 8
 9
10
11
12
13
14
15
16
17
18
19
20
21
22
23
24
25
26
27
28
29
30
31
32
33
34
35
36
37
38
39
40
41
42
43
44
45
46
47
48
49
50
51
52
53
54
55
56
import java.time.LocalDateTime;
public class Task {
private int id;
private String title;
private boolean completed;
private LocalDateTime createdAt;
public Task (String title) {
this .title = title;
this .completed = false ;
this .createdAt = LocalDateTime.now ();
}
public int getId () {
return id;
}
public String getTitle () {
return title;
}
public boolean isCompleted () {
return completed;
}
public LocalDateTime getCreatedAt () {
return createdAt;
}
public void setId (int id) {
this .id = id;
}
public void setTitle (String title) {
this .title = title;
}
public void setCompleted (boolean completed) {
this .completed = completed;
}
public void setCreatedAt (LocalDateTime createdAt) {
this .createdAt = createdAt;
}
@Override
public String toString () {
return "Task{" +
"id=" + id +
", title='" + title + '\'' +
", completed=" + completed +
", createdAt=" + createdAt +
'}' ;
}
}
Task 4: Implement the TaskController Create a class named TaskController to handle database operations:
1
2
3
4
5
6
7
8
9
10
11
12
13
14
15
16
17
18
19
20
21
22
23
24
25
26
27
28
29
30
31
32
33
34
35
36
37
38
39
40
41
42
43
44
45
46
47
48
49
50
51
52
53
54
import java.sql.*;
import java.util.ArrayList;
import java.util.List;
public class TaskController {
private final Connection connection;
public TaskController () throws SQLException {
this .connection = DatabaseConnection.getInstance ().getConnection ();
}
public void addTask (Task task) throws SQLException {
String sql = "INSERT INTO tasks (title, completed) VALUES (?, ?)" ;
try (PreparedStatement stmt = connection.prepareStatement (sql)) {
stmt.setString (1, task.getTitle ());
stmt.setBoolean (2, task.isCompleted ());
stmt.executeUpdate ();
}
}
public List< Task> getAllTasks () throws SQLException {
List< Task> tasks = new ArrayList<> ();
String sql = "SELECT * FROM tasks ORDER BY created_at DESC" ;
try (Statement stmt = connection.createStatement ();
ResultSet rs = stmt.executeQuery (sql)) {
while (rs.next ()) {
Task task = new Task(rs.getString ("title" ));
task.setId (rs.getInt ("id" ));
task.setCompleted (rs.getBoolean ("completed" ));
task.setCreatedAt (rs.getTimestamp ("created_at" ).toLocalDateTime ());
tasks.add (task);
}
}
return tasks;
}
public boolean markTaskAsComplete (int id) throws SQLException {
String sql = "UPDATE tasks SET completed = true WHERE id = ?" ;
try (PreparedStatement stmt = connection.prepareStatement (sql)) {
stmt.setInt (1, id);
int affectedRows = stmt.executeUpdate ();
return affectedRows == 1;
}
}
public boolean deleteTask (int id) throws SQLException {
String sql = "DELETE FROM tasks WHERE id = ?" ;
try (PreparedStatement stmt = connection.prepareStatement (sql)) {
stmt.setInt (1, id);
int affectedRows = stmt.executeUpdate ();
return affectedRows > 0;
}
}
}
Task 5: Implement the main application class (CLI Interface) Create the main application class with a command-line interface:
App.java
1
2
3
4
5
6
7
8
9
10
11
12
13
14
15
16
17
18
19
20
21
22
23
24
25
26
27
28
29
30
31
32
33
34
35
36
37
38
39
40
41
42
43
44
45
46
47
48
49
50
51
52
53
54
55
56
57
58
59
60
61
62
63
64
65
66
67
68
69
70
71
72
73
74
75
76
77
78
79
80
81
82
83
84
85
86
87
88
89
90
91
92
93
94
95
96
97
98
99
100
101
102
103
104
105
106
107
108
109
110
111
import java.sql.*;
import java.util.List;
import java.util.Scanner;
public class App {
private final TaskController taskController;
private final Scanner scanner;
public App () throws SQLException {
this .taskController = new TaskController();
this .scanner = new Scanner(System.in );
}
public void start () {
while (true ) {
System.out .println ("\n=== Todo List Application ===" );
System.out .println ("1. Add new task" );
System.out .println ("2. List all tasks" );
System.out .println ("3. Mark task as complete" );
System.out .println ("4. Delete task" );
System.out .println ("5. Exit" );
System.out .print ("Choose an option: " );
try {
int choice = Integer.parseInt (scanner.nextLine ());
switch (choice) {
case 1:
addTask();
break ;
case 2:
listTasks();
break ;
case 3:
markTaskComplete();
break ;
case 4:
deleteTask();
break ;
case 5:
System.out .println ("Goodbye!" );
return ;
default :
System.out .println ("Invalid option!" );
}
} catch (NumberFormatException e) {
System.out .println ("Please enter a valid number!" );
} catch (SQLException e) {
System.out .println ("Database error: " + e.getMessage ());
}
}
}
private void addTask () throws SQLException {
System.out .print ("Enter task title: " );
String title = scanner.nextLine ();
Task task = new Task(title);
taskController.addTask (task);
System.out .println ("Task added successfully!" );
}
private void listTasks () throws SQLException {
List< Task> tasks = taskController.getAllTasks ();
if (tasks.isEmpty ()) {
System.out .println ("No tasks found!" );
return ;
}
System.out .println ("\nAll Tasks:" );
for (Task task : tasks) {
String status = task.isCompleted () ? "[Completed]" : "[Pending]" ;
System.out .println (task.getId () + ". " + status + " " + task.getTitle ());
}
}
private void markTaskComplete () throws SQLException {
System.out .print ("Enter task ID to mark as complete: " );
try {
int id = Integer.parseInt (scanner.nextLine ());
if (taskController.markTaskAsComplete (id)) {
System.out .println ("Task marked as complete!" );
} else {
System.out .println ("Task not found!" );
}
} catch (NumberFormatException e) {
System.out .println ("Please enter a valid ID!" );
}
}
private void deleteTask () throws SQLException {
System.out .print ("Enter task ID to delete: " );
try {
int id = Integer.parseInt (scanner.nextLine ());
if (taskController.deleteTask (id)) {
System.out .println ("Task deleted successfully!" );
} else {
System.out .println ("Task not found!" );
}
} catch (NumberFormatException e) {
System.out .println ("Please enter a valid ID!" );
}
}
public static void main (String[] args) {
try {
new App().start ();
} catch (SQLException e) {
System.err .println ("Failed to start application: " + e.getMessage ());
}
}
}
Task 6: Evaluate Your Implementation Run the included unit tests under the src/test/java/cpit305/fcit/kau/edu/sa/ package.
Deliverables and Submission Please push your code to GitHub for auto-grading and submit a PDF file with screenshots showing your implementation.
Submit on GitHub Classroom Section: IT1
Section: IT2
Section: IT3 If your instructor is using GitHub classroom, then you should click on your class submission link,
link your GitHub username to your name if you have not already done so, accept the assignment, clone the
repository into your local
development environment, and push the code to the remote repository on GitHub. Please make sure that your
written
answers are included in either a README (Markdown) file or a PDF file.
Lab dues dates are listed on GitHub classroom unless otherwise
noted.
If your instructor is using GitHub classroom, your submission will be
auto-graded
by running the included unit tests as well as manually graded for correctness, style, and quality.
How to submit your lab to GitHub Classroom The video below demonstrates how to submit your work to GitHub classroom
VIDEO